Bargain Buys

Check me out. This week I have been an absolute bargain hunting fiend, as I’ve picked up not one, but two bloody good finds over the past seven days, that I really wanted to share with you.

During the summer, I literally LIVE in my pumps, and for the past two years, I’ve been living in a brown patterned pair that I picked up off Ebay a couple of years ago. But, I recently realised that this may be the last summer of their wee little lives, as they’ve started to wear a tad. So, I’d been casually scouting around for a new pair that I could live in, for next year.

I managed to find these little cuties:

I ❤ these!!

And, if you look reeeeeally closely, you’ll be able to see how extremely expensive they were. Okay, I’ll make it a little bit easier to see 😉

Too close??

So, yep, I paid £2.99 for these New Look shoes, and I really love them. I can’t wait til next summer when I can wear them properly. But, for the time being, I’m wearing them around the flat, until the cold weather sweeps in and forces me to wear my ugg boots indoors like the past few winters (eep!)

Gotta have a bow!!

But oh-no, that’s not all folks, because I managed to pick myself up an even BETTER bargain (oh yes, it most definitely is possible.

I managed to bag all five of these polishes for just £2.99 in Boyes. And yep, they’re Rimmel! Holy crap right? Admittedly, they had obviously been sat around for a very long time, and needed a damn good shake-up, but for £2.99 it was definitely worth it!

I’m not sure if I’d use the Nail Tip Whitener, but I’m actually quite excited to swatch these polishes, because they’re all absolutely stunning colours.

What do you think, and what bargains have you picked up recently?
Photobucket

NOTD: Retro Style

It’s kinda weird, over the past twelve months, I’ve gotten quite into doing weird things with my nails, you know, being creative with them. But, I never seem to remember to do any Nails of the Day, in fact, I think that over the course of this blog, I’ve only done two, and both of those were Konad-based.

Well, rest assured that todays is not Konad based. It’s not complicated. It’s not all fancy-pants. It’s just simple, and probably won’t be to a lot of people’s tastes, but y’know, I kinda like it, in a really Retro 1980s kind of way. And most importantly, it is so easy peasy to achieve.

Sorry that the quality of this picture isn’t too great, but I had to do it using my phone, and luckily for this NOTD you don’t really need a Hi-Def quality image, because you can still pretty much see where this is doing.

The Inspiration:

I was really inspired by those jumpers that were very fashionable in the 1980s, and have made a bit of a comeback recently, that are made up of block colours, similar to this one which is available for £35 at BashfulBatWings.

What Do You Need?

You don’t have to use the same colours as me, because I know that they definitely won’t be too everyone’s taste, but you can probably guess that you just need to find two colours that complement eachother 🙂

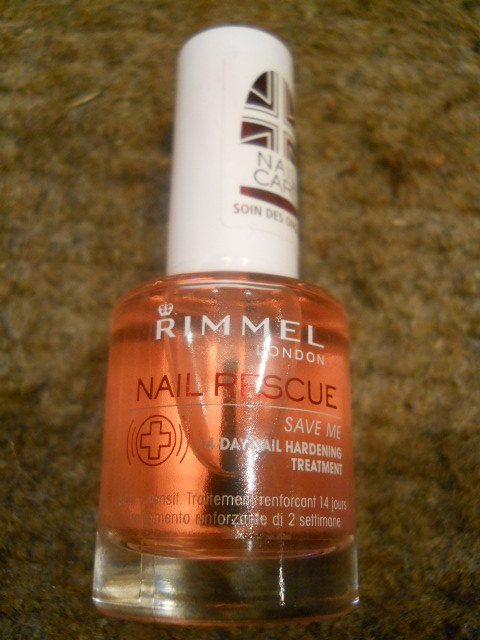
1. Anyway, I started out by applying a quick base coat. I used Rimmel’s Stronger Double Duty Base Coat, which both strengthens and protects your nails. With my nails being relatively long now, I need to extra strength. But, I’ve found that using a good base coat keeps the polish one when you want it to, but protects your nails from staining, which is good if you wear bright or dark colours, such as oranges or navy blues.

This base coat really doesn’t take very long to dry, although it does stay sticky for quite some time. I’m told that it’s okay to apply whilst it’s sticky, as this apparently helps the colour to stay on (a Nail Technician told me that, so don’t argue with me hehe :))

2. Apply your base coat. I used Rimmel’s 60 Seconds in Sky Blue, which is Number 825. I absolutely love this colour. It’s kind of a green colour, but also kind of looks bluey. It reminds me of the “Sea Green” Crayola pencil crayon that I used to always choose over every other colour when doing colouring in Primary School, so maybe that’s why I love it so much.

Advice I was given by Liloo: If you have trouble applying your polish, in that you always smudge it. Make sure that you apply the hand that you have most trouble with first. Leave it to dry. And only then, move onto the easier hand. Repeat again for extra coats.

For this colour, I think two, maybe three coats are necessary. You really can’t get away with just one coat.

Advice I was given by a Nail Technician: Make sure you apply in very thin layers, to allow the coats to dry quicker and smoother. And don’t rush to apply polish too quickly after each coat, as you run the risk of creating bubbles, or just making a mess.

3. Give the base coat plenty of time to dry, before taking your final polish. For this I used ELF’s Light Red, which is another colour that I love. It’s quite a bright red in colour, but applied over the Greeny Blue, it kind of darkens, which I personally felt worked really well for the look I was trying to achieve.

Basically all I did for the final step was sweep the polish across the tip of your nail. The cool think about this look, is that you don’t need to do them in perfectly straight lines, in the way “Tips” are done. Instead they can be slanted, which makes for an even more Retro feel. In the past, I’ve been a bit more creative with this, doing slanted sweeps that take up more of my nail, but for this one, I decided to just do the tips, because sometimes trying to do more can end up looking messy.

Anyway, I hope that you enjoyed this look, and maybe give it a try. Let me know if you do 😉
Photobucket

Rimmel Glam’Eyes Liquid Eyeliner

I have been meaning to review this eyeliner for absolutely ages, and after my ELF Cream Eyeliner review, over the weekend, I though that today would be a good day to get this review done.

Rimmel Eyeliner and Me: Until I discovered the wonders of Urban Decay, I used to swear by Rimmel’s pencil eyeliners, and they were the only brand that I would wear.

Therefore, it might actually surprise you, to know that I’ve never actually tried a Rimmel Liquid eyeliner. In fact, my liquid eyeliner experience generally spirals around Barry M. So, when Rimmel recently had a 3 for 2 offer going on, in my local Tesco, I had to give it a shot.

Why I picked this eyeliner: I was really keen to give this liquid eyeliner a try, from the moment that I opened the container in the shop. As I mentioned in my ELF Cream Eyeliner review, I’m really heavy-handed when it comes to eyeliner, and as a result, I tend to struggle to get lines that are a. straight and b. quite fine. Don’t get me wrong, sometimes I want a thick and dramatic line, but sometimes, especially during the day, I want a subtle line that frames the eye and makes it “pop” a little, rather than a bold one that makes a statement.

So, finding a liquid eyeliner with a brush that was as fine as this one, left me thinking:

“Oh thank god, I have finally found the liquid liner that I’ve spent the past five or so years looking for.”

That might sound a little extreme, but this really is the type of liner I’ve been looking to use, for a very long time!

Usage: I found this eyeliner really easy to apply, and you don’t need a lot of product on the brush to get a really good effect. Out of all of the liquid eyeliners I’ve tried, I definitely rank this one highest in terms of creating a fine line. And, if I can go it, then anyone can.

 As you can tell from the picture, the liner works great for both fine and thicker lines, and if you look closely, especially at the thicker one, you can just about tell that the liner isn’t completely back, but has a bit of shimmer to it, which makes it great, if you’re not comfortable wearing a really bold black eyeliner. Or, even if you fancy a little bit of sparkle in your life.

Downside: As much as I like this eyeliner, there was of course, one downside. It takes absolutely ages to dry. Maybe this was just me, but I dunno, it just seemed to take so long and when you’re dashing about trying to get ready, it’s easy to suddenly realise that you have a big dollop of eyeliner on your eyelid, which is really annoying.

To be honest, I don’t think I’ve ever experienced a liquid liner that has taken this long to dry. Mascaras are normally the eye make up that leaves dots everywhere, so I’m a little surprised with this liner.

Available in four different shades:

  • Black Glamour
  • Intense Plum (which looks more lilac than plum, on their website)
  • Diamond Kiss
  • Precious Green

Available from:

Price: £5.29, although often part of various offers.
Have you tried Rimmel’s Glam’Eyes Liquid Liner? What do you think? Or perhaps you know of some other liquid eyeliners that create a thin line, without too much effort, for those of us who are heavy-handed. 

Photobucket

PS. The Ji Ji Kiki Giveaway is now closed. Thank you to everyone who took part. A winner has been selected, and I’ll be announcing that very lucky winner later today 🙂

Rimmel Nail Rescue 14-Day Challenge

It’s no secret that I bite my nails. I’ve done it since my first year of Primary School, in roughly 1989, and I no doubt always will bite them. Nevertheless, since I’ve gotten more into doing my nails with Nail Art, such as Konad, I’ve found that I’m biting them a great deal less. This is of course brilliant news for my poor nails. Unfortunately, 22 years of incessant nail biting has led me to discover that I have very weak nails.

To be fair, I’ve never really paid that much attention to my nails. I very rarely moisturise them, other than when I use Hand Cream, I don’t do anything to my cuticles (I don’t thin I’d know where to begin!).
But after accidentally ripping part of my thumb nail off, I’ve come to the conclusion that it really is time to actually do something good for my previously unloved talons.

Rimmel currently have a 3 for 2 offer on all of their products, in both Boots and Tesco, so I decided to have a brief browse. The thing is, I wasn’t actually looking for something to specifically treat weak nails, but rather for a Base Coat, because I’d noticed a few Beauty Bloggers going on about how important it is to use one. Whilst looking at the nail polishes, I noticed that they also sell a Nail Rescue product, that strengthens the nails in 14 days.

So, I decided to take up Rimmel’s challenge to make my nails stronger in 14 days, and yep, you guessed it. You guys are most definitely coming with me.

It’s now been three days since I actually started the challenge, which involved:

Day One: Applying a first coat to each nail

Day Two: Applying a second coat to each nail

I’m on Day Three now, and I don’t actually need to do anything else until Day Seven. BUT, i’m finding the whole thing to be a little bit weird, because I have to admit that I am not a fan of clear nails. Personally, I find it to be bloody boring, and I’m finding that I just want to put something else with more colour oiver the top, but I’m not sure if you’re allowed to or not, so I won’t.

I can’t believe that I’m going to be colourless for 14 days whilsy my beautiful oranges, greens, pinks and blues are all stuck in the Fridge totally unloved. And with my new Base Coat and another E.L.F product waiting to be tried, it’s tough. But, I really want stronger nails, so that my nails will hopefully be too tough to bite!!

Anyway, Day Three and I’m already noticing a difference in my nails. They genuinely feel harder, if that makes any sense. I can definitely imagine having major issues trying to bite them, but even if they’re not pysically strong enough to prevent the biting, I’ve noticed that because I have this stuff on my nails, I’m more actively trying not to bite them. And it seems to be working….for now anyway!

I guess the real challenge comes on Tuesday. I bite my nails, predominantly, when I’m nervous (in Secondary School, the majority of my nail biting occured whilst standing in the queue, waiting to do the High Jump!), and I am definitely expecting to be nervous on Tuesday morning!!

That’s where I am so far, and I’m intending to post again regarding how my nails are doing over these 14 days, so remember to keep checking back!

Rimmel Vinyl Gloss Review

NOTE: I received this as a Sample from Rimmel.

I’m not really a fan of lip glosses, in fact, I don’t even wear lipstick either. I usually opt to just apply a little lip balm and that’s about it! For me, lip glosses always taste and smell like plastic, make my lips feel heavy and are just icky sticky and messy. But, when Rimmel have their Giveaways, I can’t resist, and thought that I’d give their Lip Gloss a try, opting for “Cosmic”.

Packaging: The packaging of this lipgloss is pretty standard, although maybe a little sleeker than other brands. It’s nice to get back to the tube and wand style of lip gloss, as so many other companies (including Barry M and ELF) have moved other to squeezable tubes.

Nothing about the packaging particularly jumps out and hits me, but it serves a purpose I guess.

Application: The wand is the typical “teardrop” shape, and it applies quite nicely. What I instantly noticed after the first application is how this lip gloss didn’t feel as “heavy” or “sticky” as other lipglosses. It seemed somewhat lighter, and nicer to wear.

Overall Look: The colour was fantastic, I have to say, and amazingly, I actually opted for a shade that actually suits me. I don’t know if it made me lips look “40% curvier” as the Rimmel London website claims, but it does looks great, and it certainly is shiny.

I am definitely considering using this when Party Season hits around Christmas, and you may just find this product in my handbag instead of my boring lip balm. I’ve even found myself experimenting with a lipliner, that is something that I haven’t used for about ten years, because, well, I’ve never really taken to the “Jacqui McQueen” look!!

So, this is evidently a very quick review, but I’m actually in the process of moving to a brand new flat, so hopefully when I’m fully moved (at the end of the month), I will have more time to dedicate to my blog. And I’m really keen to get blogging again, because with flat-hunting, and now moving, alongside doing real paid work, I’ve been struggling to find the time to get down to blogging. So I hope you’ll all bear with me, just for a little longer 🙂

post signature

Rimmel Matte Finish Top Coat Review

For a while I’ve been reading a lot of reviews and talk about Matte nail polish, and I have to admit that at first, I really did not understand the hype. I think my issue has always been that I just think that nail polish is meant to be shiny, I mean isn’t that one of the reasons why we apply a Top Coat (along with protecting your polish, and making sure that it lasts longer without chipping), to get shine.

However, after Dottie K reviewed the Matte polishes, including the Rimmel Matte Top Coat on her blog, I decided that it was worth a try, and for £4.50 (ish) I honestly hoped that it was going to be worth the money.


Expensive? At first glance nearly £4.50 seems expensive for a Top Coat (in my cheap-minded opinion anyway!), however, the bottle is actually larger than conventional Rimmel polishes,which are typically 8ml, whilst this is 12ml. Plus, I also purchased this as part of Superdrug‘s Buy 2 get one Free offer on Rimmel cosmetics.

How do it work? The matte top coat has a thick, opaque consistency that dulls the appearance ofthe shade that it is covering. This in effect hides the polish’s natural shine.

How does it fair? Obviously since this is a Top Coat, I had to test this over the top of different nail polishes to see which colours looked the best. Because I tested so many colours, I decided to divide them into sections to make this easier:

It was interesting to see each shade with the matte coat on top (it was even more interesting to see each of my nails as a completely different colour!) and it gives the shades a whole new lease of life, but I have to say that the matte-look doesn’t really look that nice on paler shades, although I really loved how it looked on Rimmel’s Sky High.

The Matte polish looks great on darker shades.

The brights I was in two minds about, mainly because two of the brights I have, tended to be quite shimmery, and the top coat didn’t seem to get rid of that shimmer, so effectively it didn’t work at achieving what the Matte Top Coat was aimed to achieve. So, I’m assuming that any glittery polishes will have the same effect (or lack of)

 Who is the Matte Top Coat for? Anyone who is looking to revamp their existing Nail Polish collection, or who isn’t a fan of shiny and glossy nails.

post signature
Enhanced by Zemanta

Rimmel 3 Looks Mascara Review

 I have a confession to make. I got this mascara from Rimmel in a giveaway over a month ago, and I thought that I’d already done a blog, but I realised the other day that I haven’t, and I have no idea how this one slipped through at all! Aw well, as the old saying goes: “Better late than never!!”

Rimmel mascara and Me: I am an enormous fan of Rimmel’s mascara. I sometimes detour to other brands, but I always seem to head back to Rimmel eventually, usually more specifically towards their Sexy Curves mascara, which I love because it never ever clumps and always looks fab. But, I’ve tried several in the past, so I was really excited about trying this one out!

Packaging: I’m not really one to get all clucky about mascara packaging, but I really love the packaging for one, because it is so cute and chunky, whereas other mascara’s tend to be taller and slimline. I think that it has real appeal purely because it looks different to normal ones.

The Three Settings: As the name suggests, the mascara comes with three settings,which you navigate through by twisting the two part of the bottle. It’s automatically set to 3 which is for “bigger” looks, I’m assuming because you get more liquid on the wand, whilst 1 has less product for more subtle looks.And, of course, setting 2 is supposed to be a little in the middle.

I have to admit that I have never used this on the middle (second) setting, because there is such little difference between the other two settings, that it just seems a bit pointless. This is when I really wish I had a camera (ordered in time for Christmas, woo!) so that I could really demonstrate, and see for myself, if there really is a difference between the three settings or not.

The Actual Mascara: On the whole, the mascara was brilliant, just like Sexy Curves I didn’t get any clumping on the first setting, although it did clump a little on the number 3. Both settings that I’ve used made my lashes look long and really wide-eyed, which is always impressive.

Smaller Bottle and Wand: My initial reaction to the bottle being shorter than other mascaras made me think “huh, does that mean it won’t last very long”, but you have to remember that whilst it’s shorter, it’s still fatter which makes up for it.

I love the smaller wand, because it is much easier to handle for someone (meaning me) with terrible hand-eye coordination, and I didn’t find myself dotting my nose with the end of the wand!

Overall: It’s a cute little mascara, that doesn’t clump (too much) and loves great, even if there isn’t that much difference between the settings!

post signature

Enhanced by Zemanta

Product Haul

It’s weird. In the four months that I’ve been writing this blog, I’ve never actually done a Product Haul, so I thought I’d change that! At the minute, I don’t have a decent digital camera to take photos of swatches and stuff, and my camera phone is completely rubbish, so for now, we’ll just have to stick with stock photos, which is a little disappointing, but hopefully it’s only a short term thing.

Anywho, on a trip to Newark today, I had a mini haul of a few products that I’ve been wanting to try for a while.

First off, I’d been hearing a lot about Rimmel‘s “I Love Lasting Finish Fruities Collection”, which apparently smell like fruits. This sounds incredibly gimmicky to me, and I don’t personally see why you’d want fruity smelling nails, but I guess I’ll have to see for myself. I bought “Lemon Drop”, which is a pale, pastel shade of yellow, and which I’m guessing will have a lemony type smell. Not sure what to expect with that one, but I’m half expecting it to smell like Lemon Cif!!!! I’ll have a review of that tomorrow, once I’ve had a play with it! Apparently it’sscent comes through when dry…interesting!
I got it from Superdrug for £2.99 (although it was part of Rimmel’s 3 for the price of 2, but I only wanted one!!)

The second product I bought was a bit of a fluke. I dyed my hair over the weekend, which left my hair feeling really dry at the ends, so I was looking for an intensive conditioner just to deep condition the ends, and I happened across Simple’s New “Intensive Conditioning Treatment for Sensitive Scalp” in Poundstretcher. At only 99p, this was an absolute bargain, so I’m very chuffed about that. Going to try this Friday night when I’m getting ready to go out…Whoopee!!

Finally, my last buy was also for my hair. As you know,I’m always on the look out for productsthat will help bring my limp, fine hair back to life. My Pantene Aqua Light has done a fab job, but sometimes I’d just like a little bit of volume. So, I decided to buy Tresemme’s “24 hour Body Root Boosting Spray”. Not really sure why it says “New” on the bottle, because I actually bought this for my Aunt quite a while ago!! But hey ho. I got this from Savers for £2.99, and is yet another product I’ll test out on Friday night!


Well, these should keep me busy for a little while. I’d love to hear from anyone that has tried any of these products with your thoughts. I’d especially love to hear any comments on the fruity polishes from Rimmel!

post signature

Enhanced by Zemanta

Rimmel Match Perfection Foundation Review


Today’s review is a little different to normal, because this isn’t something that I went out and bought, but rather something that I won in a Rimmel Giveaway. The incredible thing is, that I actually received a whole bottle of this foundation, so it’s not even like it’s just a sample! And Rimmel gave away 10,000 of these?? Crazy! But, I’m not complaining! I’ll try to review this in a similar fashion (although not entirely the same) as my normal reviews!

My Problem Areas: Normally, this is where I write redness, but in all honesty, since my gentle and oil-balancing skin care regime, including the usual use of a mineral-based foundation, my face really doesn’t seem to be so red anymore. I do, however, have a few spots which are in desperate need of hiding.
What does the Foundation claim to do? The name “Perfect Match” pretty much sums up what Rimmel claim this product does. It is supposed to “adapt to skin tone and texture” to give the wearer a “perfectly flawless finish”. This is apparently because of a technology called “Smart Tone” which “mimics” your skin tone. It is supposed to be very blendable.
Does it do what it claims to do? I’ll be honest, I got shade 201, which is Classic Beige, and it is far too dark for my skin tone. But, when you think about it in a literal sense, if this “Smart Tone” is as good as they make out, surely it should still adapt to my skin tone, right? Yeah, who am I kidding!
It’s very watery, so when I tried applying it using a foundation brush, I thought that it was a bit messy, but this the watery-ness meant that it did blend incredibly well, and it smelt really nice too.
Good Points: Blends well, smells quite nice, seems to last a really long time, and it had really great coverage, covering my bad skin perfectly.
Bad Points: It was quite messy, and unfortunately the shade was too dark. It feels awful on my skin, and never really seems to dry fully, which is really annoying. To the touch, it’s weirdly sticky.
Overall: I really wanted to like this product – it was free, who wouldn’t want to like it? But, unfortunately I don’t. I think that even if I had a lighter shade, the feeling it leaves on the skin would put me off. Going on nicely, is important for me, but feeling good is just as important to looking good. I guess it’s about feeling confident.
So, it’s fair to say, that no, I wouldn’t buy this product in the future.
Enhanced by Zemanta

Rimmel Blue Me Away Nail Varnish Review


What I was looking for: I wanted a blue nail varnish that would match a top that I am intending to wear for a night out. The Barry M’s 292 Navy nail varnish that I own is a bit too dark for what I wanted, and the first blue nail varnish that I picked up was way too light. My mum suggested this one, and when I picked it up it looked purple. I reluctantly held it next to my top, and it was the closest match.
The weird thing is that in pictures, it looks blue, and as you can see, it’s title is Blue Me Away, but looking at the bottle, it looks like a dark purple, and on my nails it looks purple too.
How this product is “Different”: I didn’t actually notice this until after I’d bought it, bit Rimmel appear to have changed their application brush, by replacing it with a New XPress Brush, that proclaims a one second application. What is different about this Xpress Brush, compared to other brushes, is the fact that it is flat, and wider than other ones.This allows for more area of the nail to be covered in one sweep than ever before.
But, does it actually work? Honestly? Yes, I think it does. Anyone that has ever read, or looked up how the experts recommend you paint your nails, the consensus is generally one sweep down the middle of the nail, and two further sweeps on each side. However, with the Express Brush, one sweep certainly covered a larger portion of the nail. The boyfriend couldn’t believe how quickly I had managed to paint them. And, even doing the right hand didn’t appear to be as much hassle as in the past. 
What about the Colour? As I said it’s a very dark purple/blue colour, which I think is absolutely gorgeous. Unfortunately, images don’t really do the colour any justice. I also think that the polish is very shiny, and is the sense of shine, a top coat is really not necessary. Plus, it looks amazing with my top!
Any Downsides? The only flaw, is that I seemed to get more polish on my skin, especially on my pinkie nail, due to the brushes width. And presumably for the sake of the Xpress Brush, this varnish was quite a bit pricier than other Rimmel polishes.